Single Sign-On for Code Management
Single Sign-On (SSO) is an authentication process that allows users to access multiple applications with a single set of login credentials. This simplifies the user experience by reducing the number of logins required and enhances security by centralizing authentication.
This guide will walk you through the steps to configure and use SSO for the Code Management application in both Qlik Enterprise (On-Premises) and Qlik SaaS environments.
Prerequisites
Before configuring SSO, ensure that the following prerequisites are met:
- A respective server should be created based on the environment (Qlik Enterprise or Qlik SaaS) in which you want to configure SSO. For instructions on how to create a server, refer to the Server Documentation.
- You must have administrative access to the Qlik SaaS account if you plan to configure SSO for Qlik SaaS.
- Browser Settings: Browser must accept third-party cookies.
SSO Configuration for Qlik Enterprise
Virtual Proxy Setup
Step 1. Log in to the Qlik Management Console (QMC): Go to CONFIGURE SYSTEM and click on Virtual Proxy.

Step 2. Create a New Virtual Proxy: Click on Create new to set up a new virtual proxy.

Step 3. Configure the Virtual Proxy: Fill in the necessary details as shown below and click Apply to save the configuration.


Step 4. Link to Central: After applying the configuration, go to the Proxies section and click on (+) Link. Select Central and click Apply.

Step 5. Verify Virtual Proxy: Open the created virtual proxy in another window and log in.

Note
Prerequisites and Virtual Proxy Setup must be completed before proceeding.
Code Management Configuration
Step 1. Server Creation: Go to Settings and create a Server with the proper details. Add the hub URL created in the previous step. Test the connection and save the configuration.

Step 2. Configure Identity Provider: Navigate to Other Configurations, open Identity Provider, add the necessary details, and click Save.

Step 3. Proxy Setup: In the Proxy section, select the SSL certificate (with .pfx format) and provide the password (if available). Click Save. The page will reload, and the protocol will switch to https.

Note
For Qlik Enterprise, you must make url secure by converting from http to https.
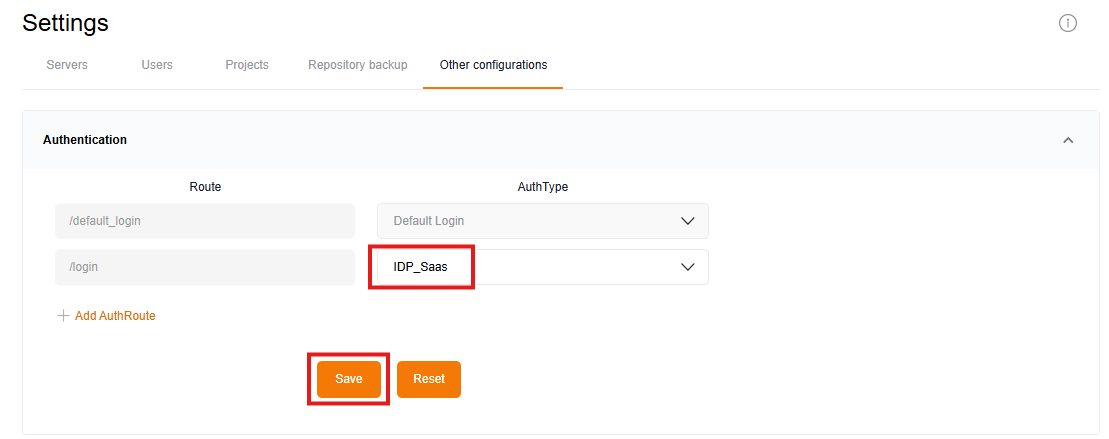
Step 4. Authentication Setup: Go to the Authentication section, select the IDP you created, and click Save.

Step 5. Logout and Test SSO: Finally, navigate to the Admin section at the bottom left corner. Try logging out, and the page will reload and automatically log you back in, as the proxy service is running.

Info
Go to proxy, remove the proxy file and click Reset to revert the protocol from https to http.
SSO Configuration for Qlik SaaS
You can also configure SSO for Code Management in Qlik SaaS. Follow the steps below:
Step-by-Step Configuration
Step 1. Log in to Qlik SaaS: Log in to Qlik SaaS with administrative privileges.

Step 2. OAuth creation: Go to Administration, navigate to OAuth and click Create OAuth and fill the details.

- for redirect url, go to the Code Management service
http://localhost:4040/settings. Go to Identity Provider and Click Create new.
Step 3. Configure Identity Provider: Go to Other Configurations, open Identity Provider, add the necessary details, and click Save.

- Copy the redirect url and paste it in the Qlik OAuth creation. Click Create.

Step 4. Create a Server: Create a server in the SaaS environment and configure it with the required details.

Step 5. Authentication Setup: Go to the Authentication section, select the IDP you created, and click Save.
Note
Don't forget to login in to Qlik SaaS before testing.
Step 6. Logout to Test SSO:
Navigate to the Admin section at the bottom left. Log out, and the page will reload, automatically logging you back in due to the proxy service.
This concludes the setup for SSO in both Qlik Enterprise and Qlik SaaS environments.