Create Job
In Code Management, jobs are designed to automate the transfer of Qlik Sense applications across different environments. By creating jobs, administrators and super users can streamline resource management tasks, ensuring the efficient deployment and synchronization of applications between various server environments. Follow these steps to initiate and create a Job.
Steps for creation of a Job
Step 1: For first-time Job creation, the "Create New" will be prominently displayed in the center of the screen.

- For creating subsequent jobs, the "Action" will be located in the top-right corner of the screen, within which click on "New Job".

Step 2: Clicking on the "Create New" in Empty Job page or "New Job" in Actions will cause a sliding panel to appear on the right, labeled "Create New Job".

Step 3: Three movement types are available for job creation:
- Repository to Server: Moves data, applications, or resources from a repository to a server.
- Server to Server: Transfers data, applications, or resources between two servers.
- Loop and Reduce: Creates multiple reduced applications by splitting a single application based on selected field values
Repository to Server
For Repository to Server movement, the following details need to be entered in the sliding panel:
- Job Name: Enter a descriptive name for the job.
- Movement Type: Select "Repository to Server" as the movement type for this job.
- Repository: Choose the repository that contains the data, applications, or resources to be moved.
- Destination Server: Select the server to which the data, applications, or resources will be transferred.
- Destination Stream: This will appear only if the destination server requires a specific stream.
- First Movement: Check this box if this is the first movement of data to the destination server.

- Application (If not first movement): If this is not the first movement, select the application that the data will be moved to.

Server to Server
In the sliding panel, for server to server movement the user enters the following details:
- Job Name: Enter a descriptive name for the job.
- Movement type: Select "Server to Server" as the movement type for this job creation.
- Source Server: Choose the server from which the application will be moved.
- Source Stream: Select the stream from which the application will be moved.
- Source Application: Choose the application associated with the data, applications, or resources to be moved.
- Destination Server: Select the server where the data, applications, or resources will be transferred.
- Stream: This will appear only if a specific stream needs to be selected for the destination server.
- First movement: Check this box if this is the first movement of the application to the destination server.

- Destination Application (If not first movement): If this is not the first movement, select the destination application to which the data will be moved.

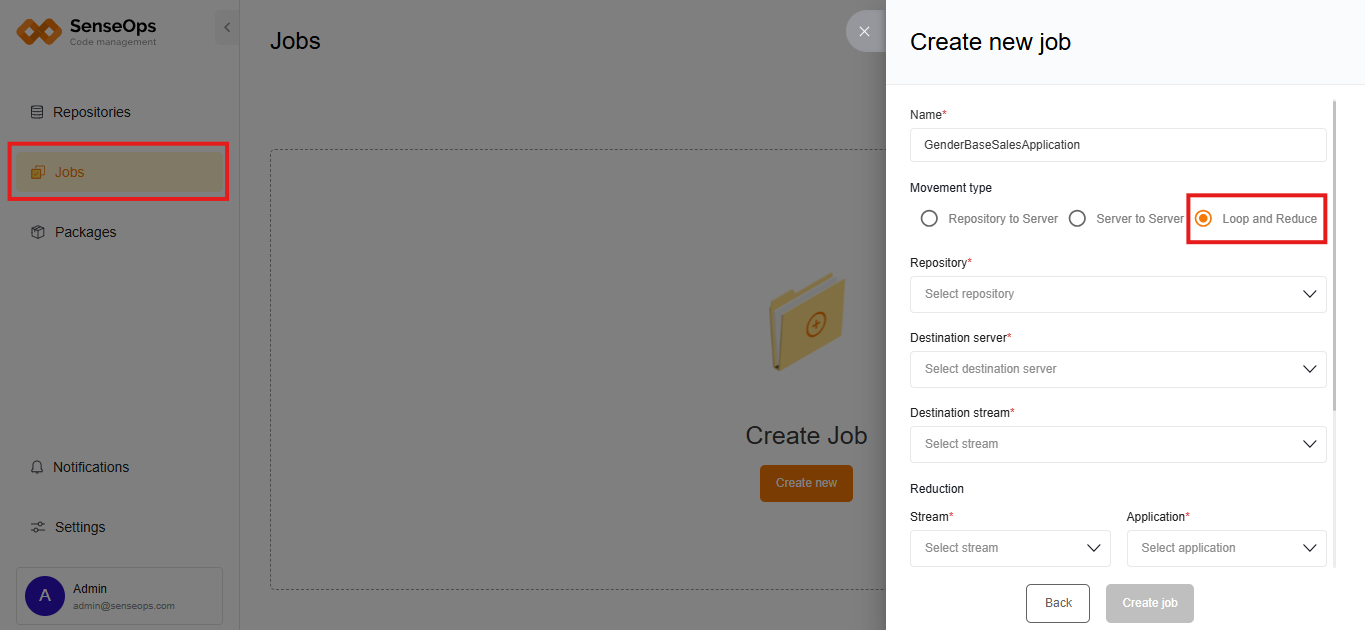
Loop and Reduce
In the sliding panel, for Loop and Reduce movement the user enters the following details:
- Job Name: Enter a descriptive name for the job.
- Movement type: Select "Loop and Reduce" as the movement type for this job creation.
- Repository: Choose the repository that contains the data, applications, or resources to be moved.
- Destination Server: Select the server where the data, applications, or resources will be transferred.
- Destination Stream: This will appear only if the destination server requires a specific stream.
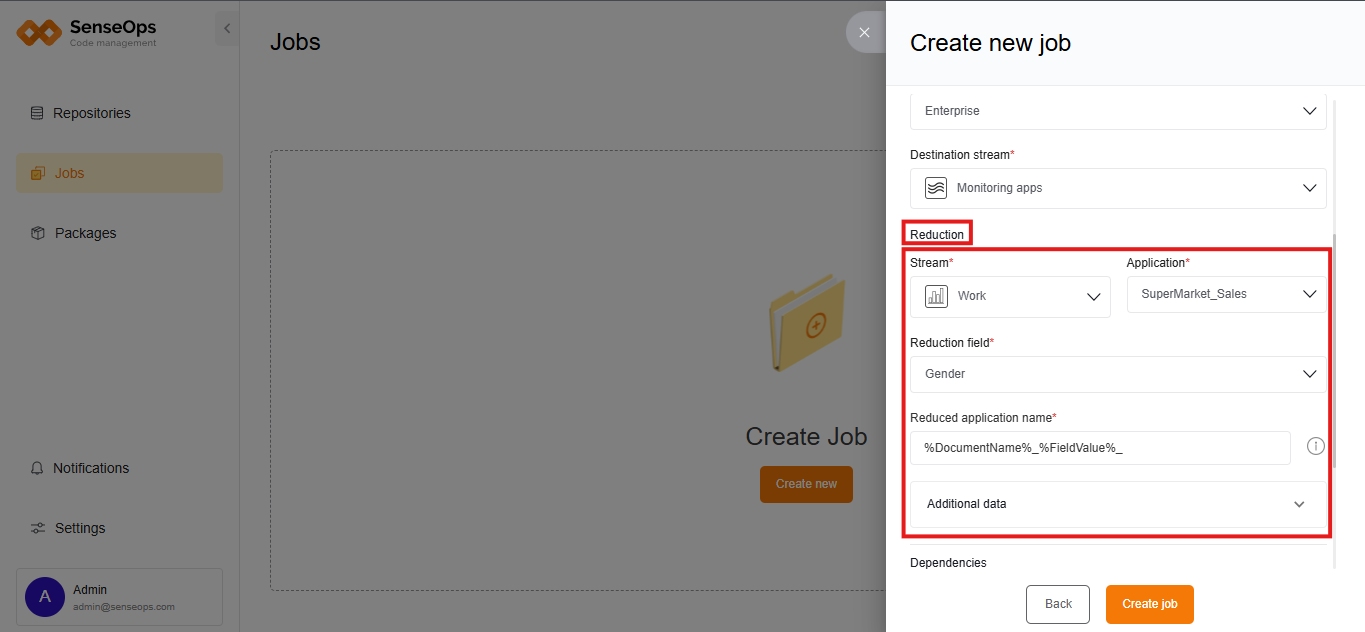
- Reduction: Reduction is used to separate the application based on the fields selected in this. It contains five selections, they are:
- Stream: Select the specific stream from which you want to add a field.
- Application: Select the respective application.
- Reduction field: Select the field name (Ex: Gender) for reduction of application.
- Reduced Application name: By default, "%DocumentName%_%FieldValue%" will be added where documentName refers to application name and field value.
- Additional data: It consists of Variable name and mapped field (field related to Reduction field).
- Dependencies: You can view all the assets (additional assets can be added), extensions, data connections (modifiable), custom properties.
- After providing the necessary details, click on the "Create Job" to finalize the job creation process.
By following these steps, administrators and super users can efficiently create Jobs to automate the movement of data and resources.
Viewing created Jobs
- After Job creation, the newly added Job becomes accessible from the Jobs page.
-
This page presents a comprehensive list of all created jobs, featuring essential details like Job name, Repository name, destination server, application name, last run time (timestamp of the job's last execution).
-
An action column accompanies each Job entry, offering options to edit or execute the Job. Selecting "Edit" allows users to modify Job details initially entered during creation.
