Alerting Installation
Login to the https://account.senseops.com/login portal and download the SenseOpsAlerting_(Version) package. It will be downloaded in a zip format. Following files will be available upon unzipping.
- SenseOpsAlertingExtension_(Version).zip - SenseOps Alerting extension file
- SenseOpsAlertingServer_(Version).zip - SenseOps Alerting server file
- SenseOpsAlertingScheduler_(Version).zip - SenseOps Alerting scheduler file
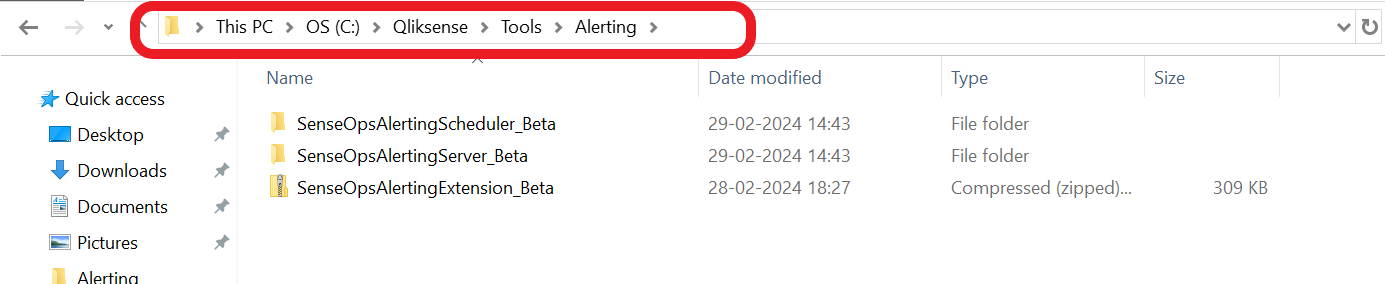
Create a Alerting folder and move the extracted folder to it. Refer the below path:
- Go to
C:\QlikSenseShare\Tools(create folder path if it does not exist) folder path and within that paste the copied zip folder.
Extension Configuration
Step 1: Navigate to the SenseOps Alerting extracted folder and open config.json in a text editor such as Notepad or VS Code.
- Add the
server_namewith the port number (e.g., "https://senseops.com:3001") andexcludeObjectsin the configuration. Then, zip the folder.

Step 2: SenseOps Alerting - Extension Installation
Enterprise Installation
- Log in to the Qlik Management Console (QMC) and navigate to Extensions.
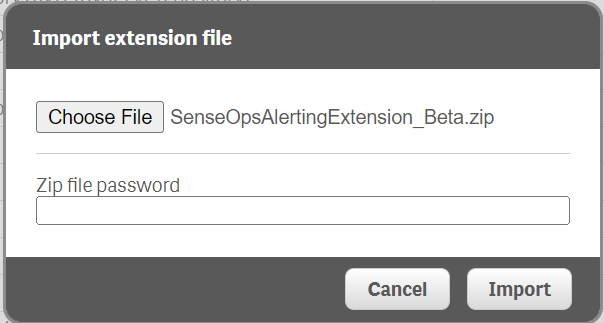
- Import the
SenseOpsAlerting.zipfile from the path\\SenseOps\Alerting\.
You will now see the Alerting extension in the Qlik hub under SenseOps extensions.
SaaS Installation
- Log in to Qlik SaaS Administration and navigate to Extensions.
- Click Add, import the
SenseOpsAlerting.zipfile, and click Upload.

Now you can open any dashboard and see the Alerting extension in SenseOps Extensions to supercharge their Qlik Sense experience.
ServerApi Configuration
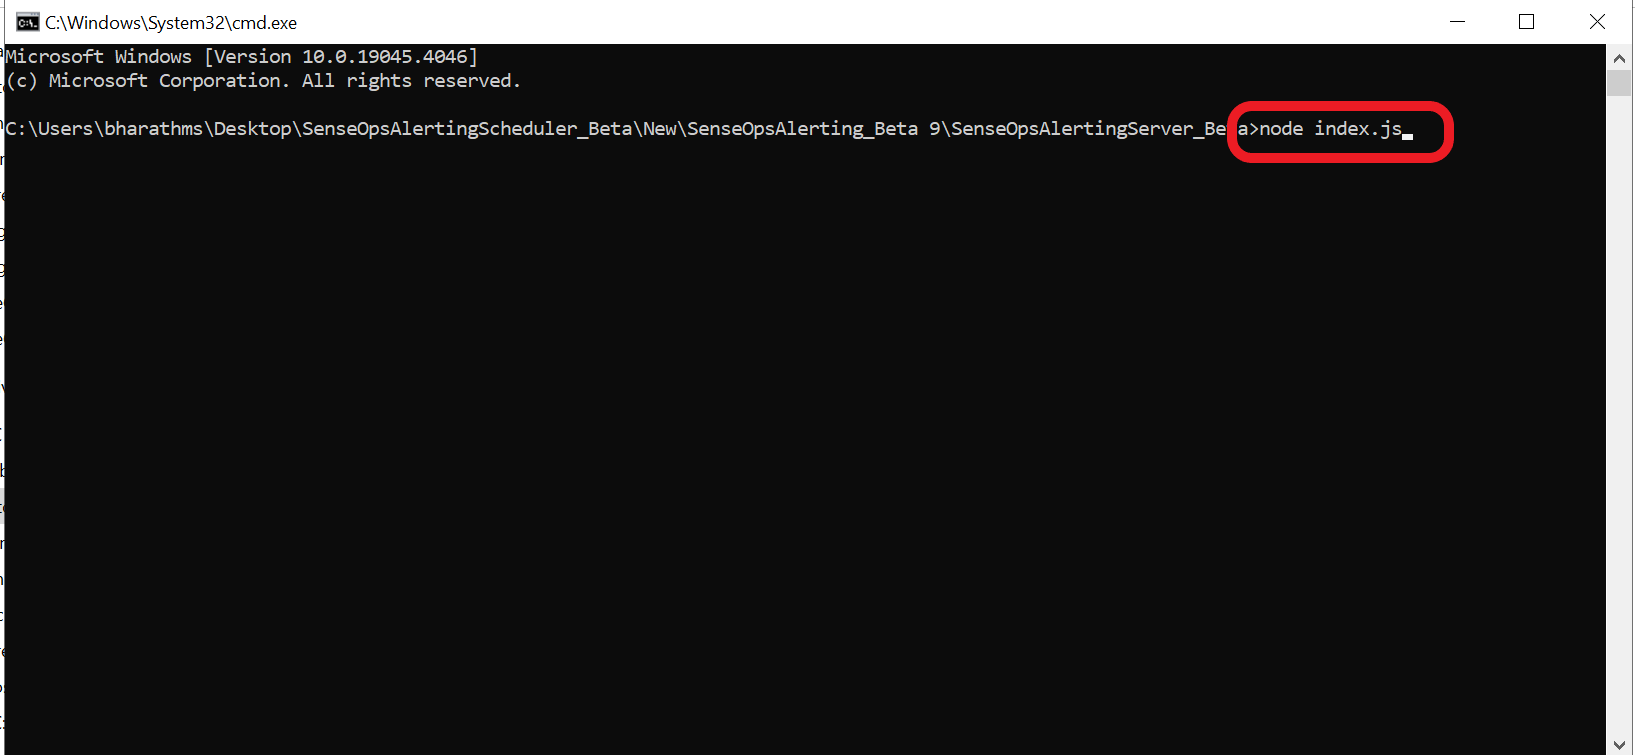
- Unzip the SenseOpsAlertingServer folder. Open the folder in command prompt with administrator privileges. Run the command
node index.js. User will receive a local server [default server: http://localhost:3001]. Open that server in a browser.
Now open the following link http://localhost:3001/config
Step 1. Database Configuration
-
The above URL will take User to a database configuration form. User can use an existing Postgres database with Qlik Repository to construct a database, or use a different Postgres instance aviable. Fill in the following details:
- Database Host Name - localhost/Custom hostname
- Database Port No - 4432/Custom port
- Datbase Username - Username of postgres
- Datbase Password - QS Repository Password/Postgres Password
-
After entering the necessary information, click on the Test Connection button. Once the connection is successful, click on the Save button.

Step 2. Proxy Configuration
Without SSL Certificate
- Add the server port. User can access SenseOps Alerting through http (local network) by unchecking the IsSecure option.

- Save the Proxy configuration and restart ServerApi in command prompt.
With SSL Certificate
- Add the server port and Check IsSecure as shown in below image.
- If Alerting needs to be accessed via https (outside the network), upload the SSL certificate along with the key or password for that certificate. Additionally, open server_port in the firewall.

- Once SSL certificate is added, Save the Proxy configuration and restart ServerApi in the command prompt.
- Manually change the connection type from http to https. Now User can access Alerting outside the network.
Step 3. Other Configuration
- Add the scheduler port and mention the domains that needs to be allowed for Contacts.
Note
User can keep ' * ' as default to allow all the domains.

- After saving all configurations, it's important to restart the service to apply the changes. This ensures that the service picks up the updated configurations and operates with the newly configured settings for Qlik Sense Alerting powered by SenseOps.

Scheduler Configuration
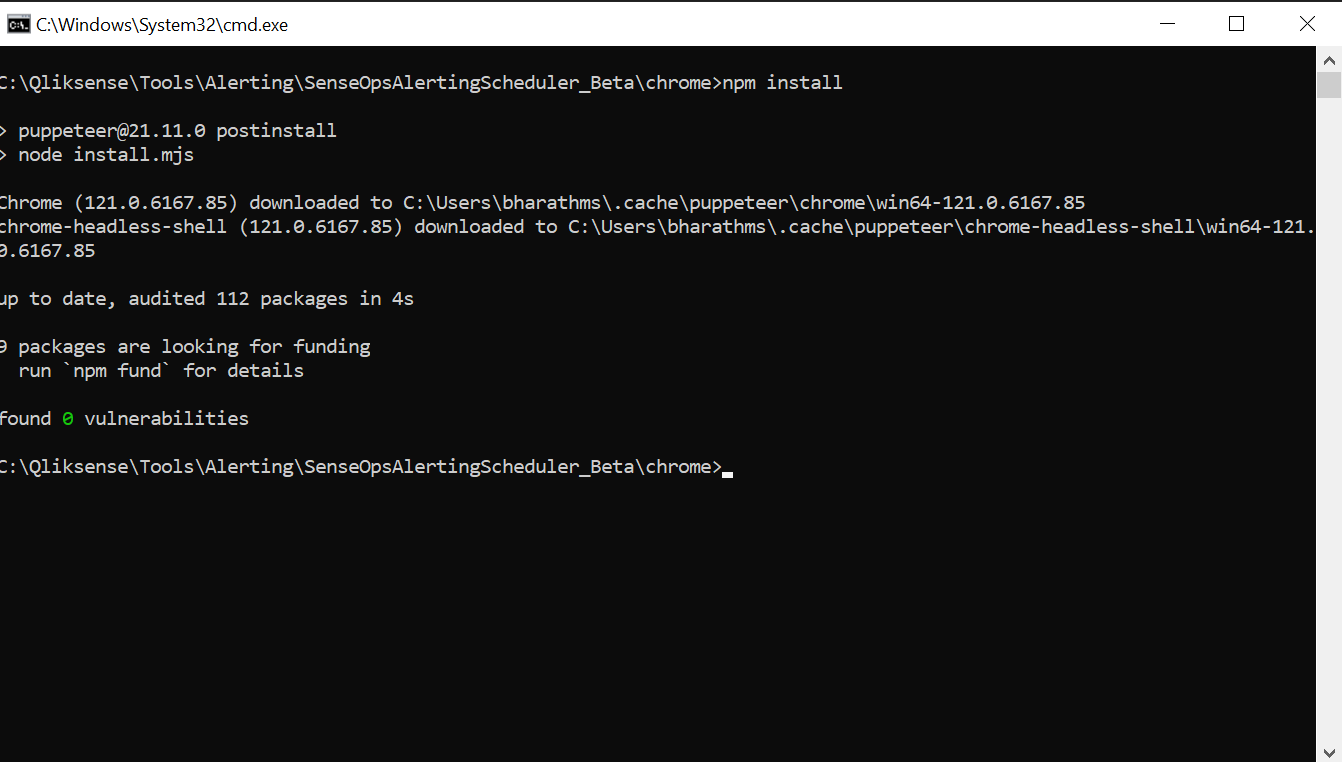
- Unzip the Alerting-Scheduler folder. Open the folder in the command prompt with administrator privileges. Install the WhatsApp web package using
npm install whatsapp-web.js. - Then Install
npm install pdf-to-png-converter. - After installing WhatsApp web and pdf-to-png convert package, now run the command
node index.js.
Now open the following link: http://localhost:5010/settings
Step 1: Database Configuration
To set up the database, follow these steps:
- Fill in the necessary information in the form. User can either:
- Use an existing Postgres database with Qlik Repository to construct a database, or
- Use a different Postgres instance if available.
- Once user entered the information, click on the Test Connection button to verify that the connection to the database is successful.
- If the test connection is successful, click on the Save button to save the database configuration.
- Database Host Name: localhost/Custom hostname
- Database Port No: Custom port of your database (default: 5432)
- Database Name: Name of Postgres database
- Dialect: Dialect name (default: postgres)
- Database Username: Username of Postgres (default: postgres)
- Database Password: QS Repository Password/Postgres Password

Step 2. Qlik Configuration
- Configuring Qlik Sense Alerting with SenseOps can be done in two ways: with Qlik Enterprise or Qlik SaaS.
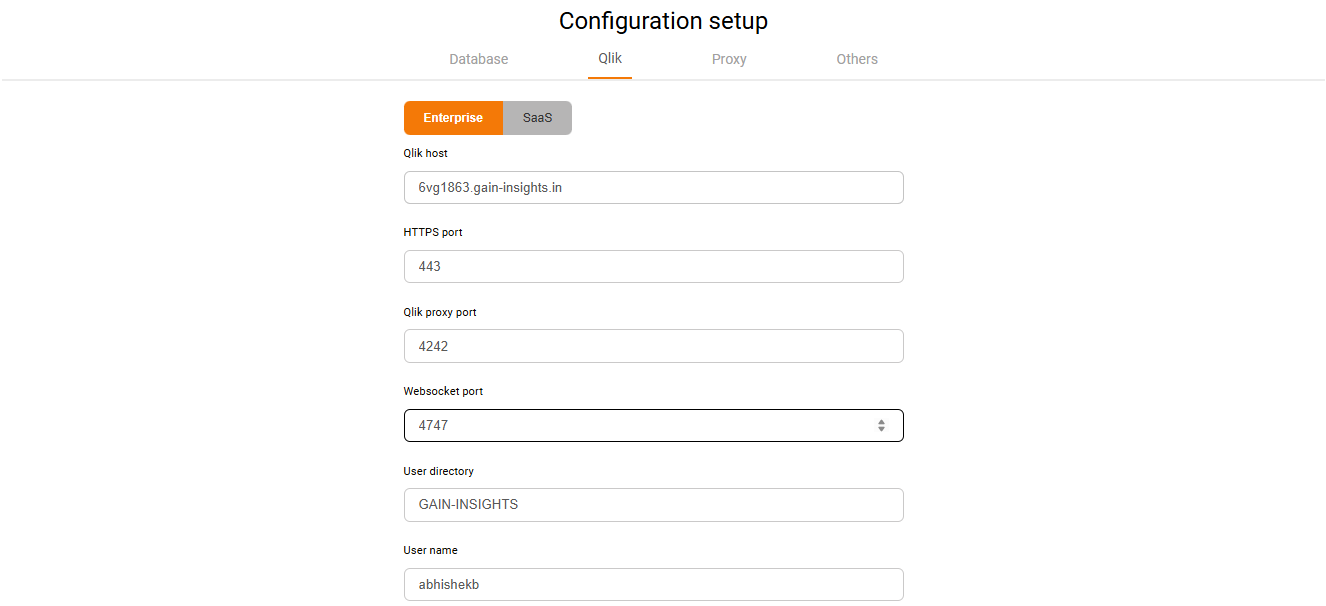
Qlik Enterprise Configuration
To configure Qlik Enterprise, follow these steps:
- Click on the Qlik Configuration tab to access the Qlik Sense configuration details.
- Select Enterprise to configure Qlik enterprise side.
-
Fill in the following information:
- Host Name: Enter the hostname or IP address of your Qlik Sense server
- HTTPS port: Default
443port is provided - Qlik Proxy port: Default
4242port is provided - Websocket port: Default
4747port is provided - User directory: Enter Qlik User directory
- User name: Enter Qlik user name
- Qlik qrfkey: Default Qlik qrfkey will be provided
- Qlik Certificates: Add Qlik certificates (root.pem, client.pem, client_key.pem)
- Node: Default central node will be provided.
-
After entering all the necessary information, click on the Test Connection to verify the connection to Qlik Sense.
- If the test connection is successful, click on the Save button to save the Qlik Enterprise configuration.

Qlik SaaS Configuration
For Qlik SaaS configuration, User will need an API Key and Client Secret.
API Key Generation
To generate an API Key, follow these steps:
1. Log in to Qlik SaaS Administration.
2. Go to Administration, then click API Keys.

3. Select Generate Now in the top right corner, then click Generate new key.
4. Enter an API key description and select an Expire time. Click Generate. your API Key will be generated.

Client Secret Generation
To generate a Client Secret, follow these steps:
1. Log in to Qlik SaaS Administration.
2. Go to Administration, then click on OAuth.
3. Select Create new on top right corner.

4. Fill in the details below,
- Client type: Since it is a web integration - select Web, other available types "Single-page app".
- Name: Give a appropriate name of OAuth.
- Description: Add the description for the OAuth.
- Scope: Specifically select user_default, apps, app.data:export,users scopes.
- Add redirectURLs: Add the redirecting URLs for the OAuth.
- Add allowed origins: Add the path that are allowed to access thig OAuth. For example -
http://localhost:5010. - Check Allow Machine to Machine (M2M) and Allow M2M user impersonation.
- Finally click on Create button to create web integration and get Client Id and one time generation Client Secret (Store the Client Secret)

Proceed to Configure Qlik SaaS by following these steps:
- Click on the Qlik Configuration tab to access the Qlik Sense configuration details.
- Click SaaS to configure Qlik SaaS side.
- Fill in the following information:
- Mail: Enter the mail of admin user.
- Tenent: Enter the hostname of your Qlik SaaS server.
- API Key: Enter the Key that has been generated in above API Key generation.
- Client Id: Enter the Client Id which has been created during Client Secret Generation.
- Client Secret: Enter the Client Secret which has been created during web integration.
- After entering all the necessary information, click on the Test Connection button to verify the connection to Qlik Sense.
- If the test connection is successful, click on the Save button to save the Qlik SaaS configuration.

Step 3: Proxy Configuration
- User needs to add the scheduler port and Save to move for further steps.
- Defualt scedular port
5010will be mentioned in input.

Step 4. Other Configuration
-
For SMTP configuration, you should have an app password, as mentioned in the prerequisites. To generate an app password for a Google account, follow this link: https://support.google.com/mail/answer/185833?hl=en.
-
To generate an app password for a Microsoft account, go to https://mysignins.microsoft.com/security-info and log in to your Microsoft account. Then, follow this link: https://support.microsoft.com/en-us/account-billing/how-to-get-and-use-app-passwords-5896ed9b-4263-e681-128a-a6f2979a7944.
Once you have generated an app password, proceed to configure the other settings by following these steps:
- Click the Others tab to access the SMTP configuration details.
There are four ways to connect to SMTP configurations:

- Admin: Provide the administrator's email address.
- Click Save to save the details.

- Mail: Provide the following information:
- Server address-SMTP: Enter the address of your SMTP server.
- Port: The default port is
587. Otherwise, specify the port number used for SMTP communication. - Email: Provide the email address to be used as the sender's email address.
- App Password: Enter the password or app-specific password associated with the email account. If using two-factor authentication, generate and use an app-specific password.
- App navigation: This option enables or disables app navigation from the email.
- Is Secure: Specify whether the SMTP connection should be secure (SSL/TLS).
- TLS Reject Unauthorized: Indicate whether to reject unauthorized connections when using TLS.
- Test the connection by clicking Test connection and click Save.

- WhatsApp: Click on Enable whatsapp to view the inputs for WhatsApp configuration.
- Whatsapp Meta: WhatsApp Meta is enabled by default.
- Phone number id: Enter the phone number ID.
- Access token: Enter the access token.
- Verify Token: Enter the verification token.
- Click Save to save the details.

- Teams: To configure Teams with SenseOps Alerting, refer to the Teams Integration guide. Fill in the following information:
- TenantId: Enter the created tenant ID.
- ClientId: Enter the generated Client ID.
- Client Secret: Enter the generated client secret key.
- Click Save to save the details.

- For the first time, you need to run the Teams route
http://localhost:<Scheduler_port>/Teams/auth/callback. - Once the page shows a successful connection prompt, you can start using Alerting for the specific tenant.
Note
Ensure that you have the correct SMTP server details and authentication credentials to successfully send emails from SenseOps Alerting.
- After saving all configurations, it's important to restart the service to apply the changes. This ensures that the service picks up the updated configurations and operates with the newly configured settings.
Installation is successful. Now you are all set to create your alerts.